How To Take Better Travel Photos Without Fancy Gear – Real Tips That Work
Planning a trip and hoping to come home with photos you’re actually proud to put on your wall?
We all come home from incredible trips with unforgettable memories — stepping onto a Galápagos island for the first time, or watching elephants cross a dusty road in Sri Lanka. But when someone says, “Show me your photos!”… it feels they don’t quite capture the moment.
That was us. Our shots were often blurred, poorly framed, or full of harsh shadows — and the few good ones felt more like luck than skill.
Since starting our travel blogging journey, we’ve learned what actually makes a photo stand out — not through fancy gear, but through small changes that make a big difference.
These are the tips that made the biggest difference for us:
1. Understand Your Camera (Even If It’s Just Your Phone)
Ruby learned this the hard way at a photography class a few years ago. Surrounded by people with large cameras and multiple lenses, she showed up with her simple point-and-shoot—and felt completely out of place.
But the instructor quickly changed that perspective. He told us something we’ve never forgotten: it’s not about the camera, it’s about how you use it. Learning to “read the view” matters far more than having the latest gear.
Since then, we’ve realised that taking better travel photos isn’t about upgrading your equipment. It’s about understanding what your camera (or phone) can actually do. Phone travel photography is high quality these days and we take 90% of our own images on mobile.
📸 Spend a little time exploring settings. Test different modes to get comfortable with the basics before your trip. It makes a far bigger difference than you might expect.

2. Use the 2/3rd Rule To Improve Travel Photography
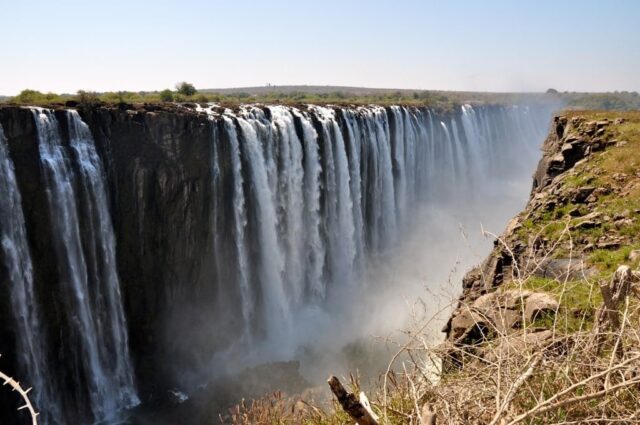
We didn’t realise how much composition mattered until we looked back at photos from places like Victoria Falls. The view was incredible—but somehow our shots felt flat and didn’t reflect what we were actually seeing.
It wasn’t until we learned about the “rule of thirds” that things started to click. Most cameras and phones have a simple grid setting that divides your screen into 9 squares.
When you look through the lens, move the screen to center and frame against the grid. Instead of placing your subject dead centre, try positioning it along those lines or where they intersect.
It sounds like a small change, but it makes a huge difference. Once we started using it, our photos instantly felt more balanced and interesting—especially for those once-in-a-lifetime destinations where you don’t get a second chance to get the shot.
📸 You can turn this grid on in your camera settings if you don’t see it automatically.
In these examples, from Africa’s incredible Victoria Falls, you can hopefully see and feel the difference of what we saw in person.

3. Use Natural Light to Transform Your Travel Photos
Once again we learned this the hard way while photographing ancient ruins in Turkey. The sites were incredible—but when we looked back at our photos later, many were ruined by harsh shadows and washed-out light.
Here’s an example—what looks like a great photo at first glance is actually spoiled by harsh shadows. So is there a best time to take photos?
It turns out timing matters more than almost anything else. The best light for travel photos is usually early in the morning or a couple of hours before sunset—when the light is softer, warmer, and far more flattering.
Now, we always try to plan key photo moments around these times. Not only do the photos look better, but you’ll often avoid the crowds too.
If your pictures are coming out too dark, too bright, or full of shadows, there’s a good chance you’re shooting in the middle of the day.
📸 If you can time tours and activities to an hour before sunrise or sunset you will get the ‘golden’ hour light effect.
4. Experiment with Different Camera Modes
For a long time, we stuck to the standard photo setting on our phones—it just felt easier. All those other options like portrait, burst, and slow motion? What on earth were these for? Not being quite sure when to use them, we ignored them.
That changed after we took a free Apple i-Phone in-store class and realised each mode is designed for a specific type of moment and really helped us to take better travel photos.
On our local beach in Siesta Key Florida, we love to capture sunsets as everyone really is different. It’s simple on I-Phone: Select Settings, then choose Display & Brightness. Tap on Automatic, then choose Options. Select Sunset!
For example, burst mode is great for capturing movement (like wildlife or kids running around), while portrait mode can make people stand out beautifully against a softer background.
Now, we switch modes depending on what we’re trying to capture—and it’s made a huge difference. You don’t need to use every setting, but it’s worth experimenting with a few before your trip so you know what works best.
Just keep in mind that some options, like RAW, take up a lot more storage, so they’re best saved for special shots.
📸 If you’re unsure where to start, check if your local camera or phone store offers free classes – a great way to build confidence quickly.
5. Ask Before Photopgrahing Someone
We’ll never forget standing in the highlands of Sri Lanka at sunrise, watching a group of tea pickers working together and laughing as they moved through the fields. It was one of those moments you instantly want to capture on camera.
But we paused. Do you take the photo… or ask first?
It can feel awkward, especially when there’s a language barrier. But we’ve learned it’s always worth taking a step to make a connection first.
A smile, a gesture, or showing them the photo afterwards can quickly break the ice. It often leads to a far more meaningful interaction than just snapping a picture from a distance.
There’s no one-size-fits-all answer. If someone asks for money for a photo, it’s a personal decision to pay. But for us, taking a moment to connect first has led to better photos, better experiences, and a lot more respect for the people we meet along the way.
📸 Explaining why you want to take a photo, or taking a selfie with them and showing it, can quickly break barriers.
6. Invest in a small tripod for Awesome Photos!
We didn’t realise how useful a small tripod could be until we were sitting in the Hvammsvík Hot Springs in Iceland. I’d packed this tiny tripod—originally a Christmas gift—but hadn’t used it once.
Then the lightbulb went off: I could take photos, videos for the blog on my own, without worrying about dropping my phone into the water… and it completely changed what was possible. This is the tripod we use:

From that point on, we’ve started using it for so much more. Whether it’s capturing night scenes, getting sharper shots in low light, or simply taking photos together without asking a stranger, it’s become one of the most useful things we travel with.
You don’t need anything big or complicated—just something lightweight that fits easily into your bag. It’s a small addition, but it opens up a whole new range of photo opportunities
📸 A bonus – Mini Tripods are inexpensive, light and easy to pack.
7. Tell A Story Through Your Photo
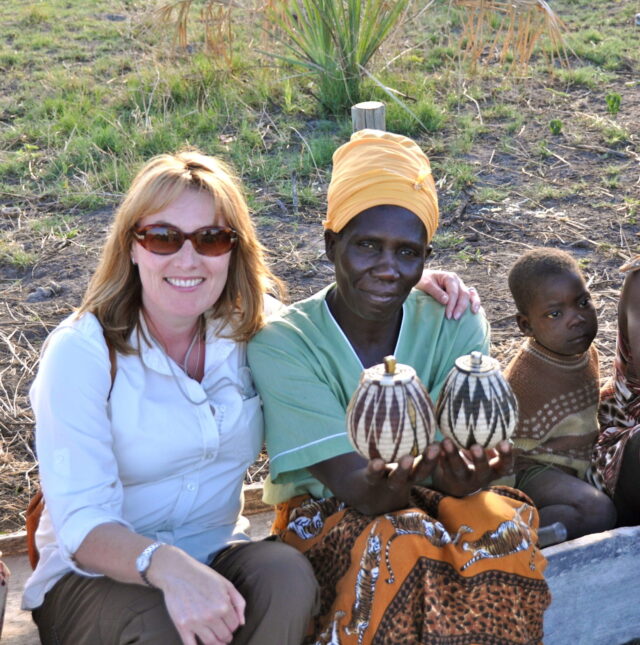
We really started to think about the difference in our photos writing a blog article featuring Botswana. In this first shot, Jude is sitting on a log next to a local woman holding baskets—it’s a nice photo, but it doesn’t tell you much about what’s happening around them.
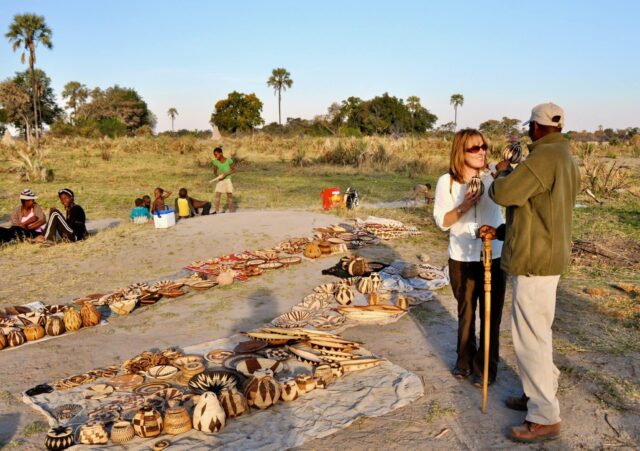
In another photo taken just moments later, the scene opens up. Jude is chatting with someone in front of a small store laid out on the ground, while behind them you can see villagers weaving baskets and children playing nearby.
Both photos were taken in exactly the same spot—but one captures a moment, and the other tells a story.
Since then, we’ve tried to step back and think about what’s happening around us before taking the shot. Including more of the surroundings, people, and context can turn a simple photo into something that really brings the experience to life.
📸 Ask yourself – what else is happening here that helps tell the story?
8. Photograph What You Love Most
Our late dad loved trees. Wherever he travelled, he’d take photo after photo of them—then carefully print them out and create albums filled with handwritten notes from each trip.
At the time, we used to laugh at just how many tree photos he had. But looking back, we realise something important—he wasn’t just taking pictures, he was capturing what mattered most to him.
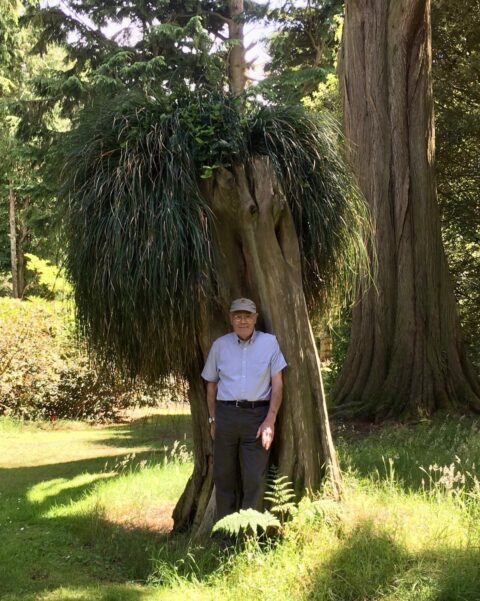
That’s something we’ve carried into our own travels. Whether it’s people, landscapes, wildlife, or small everyday moments, focusing on what genuinely interests you makes your photos more meaningful.
Instead of trying to capture everything, lean into what draws your eye—you’ll end up with a collection that tells a much more personal story.
📸 Create Your Own Coffee Table Photo Books from Travel Snaps
9. Take time to Edit and Organize
After a trip to the Galápagos with two cameras, we downloaded all our photos in one go—hundreds of them—and quickly realised we had a problem. It was completely overwhelming trying to sort through everything and find the ones we actually loved.
Since then, we’ve changed how we do things. Now, we take a few minutes at the end of each day to delete duplicates, blurry shots, and anything we know we won’t use.
We’ve also started using the built-in tools on our phones to help organise everything—things like automatically grouping similar photos, spotting duplicates, and creating albums.
It saves a huge amount of time and makes it much easier to keep track of your best shots.
📸 Most newer phones now do this automatically—you just need to switch this functionality on or review the suggestions on photo management.
It’s a small habit, but it makes a big difference. Not only does it keep your photo collection manageable, it also makes it far more enjoyable when you come home and start creating albums or choosing photos to print.

We also use the free Lightroom app on our phones for quick edits—it’s fantastic for brightening images, adjusting colours, or just giving photos that extra polish before sharing or printing.
There is a paid version with more advanced features, but we’ve found the free version works perfectly well for what we need when travelling.
It’s a quick and easy way to improve your photos without needing any advanced editing skills.
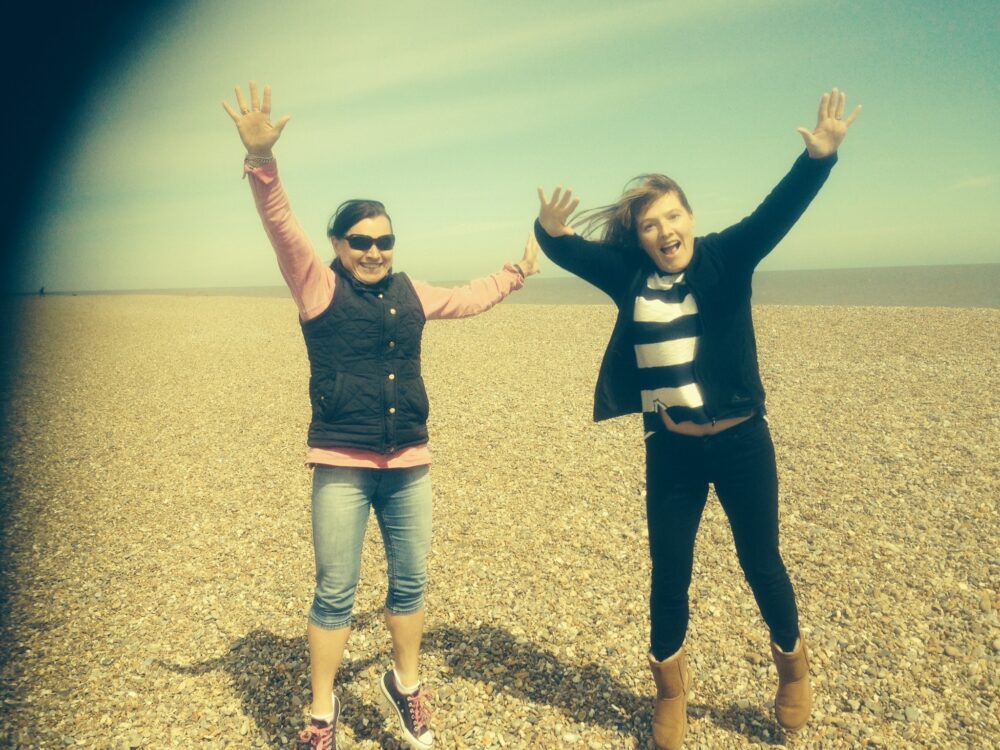
10. Have Fun!
Ultimately, taking better travel photos is about having fun—so don’t take it all too seriously.
Sometimes, the best thing you can do is put your phone away and simply enjoy where you are. We’ve all been in those moments where everyone is trying to capture the same shot, arms in the air, phones blocking the view—when in reality, the memory itself is what stays with you.
For us, the balance is key. Take the photo, capture the moment—but don’t forget to experience it too. Those are the memories that matter most!
If you’ve picked up any travel photography tips of your own along the way, we’d love to hear them—feel free to share in the comments or get in touch.